

3.2.12. WellTech BroadBand VoIP Gateway IAD 161 - broadband VoIP gateway
1. Introduction
The Welltech IAD 161 is a broadband VoIP gateway that supports:

On the front panel we have status LED that provides useful information for the status of the LAN ports, the system status, the use of the phone line (FXS port), etc.

On the back panel we have from left to the right : Reset button, 1 WAN port, 3 LAN ports, 1 FXS port and a power supply jack.
2. Asterisk PBX configuration
So let's begin: we need a working Asterisk PBX and a normal telephone. First, we have to create an user in sip.conf and some extension numbers in extensions.conf:
2.1 sip.conf

In sip.conf we are creating user welltech with password iad161, that will be in context voip.
[welltech]
username=welltech
secret=iad161
type=friend
host=dynamic
allow=all
context=voip
Note:For testing purpose we will use SNOM200 hardphone - how to configure the phone you can find here. You can use another softphone or hardphone for testing.
2.2 extensions.conf

In extensions.conf we have to create separate context called voip and in that context we will add an extension number that will be used for dialing the sip user welltech. For more information about extensions.conf you can find in this tutorial
[voip]
exten => 1234,1,Dial(SIP/snom200)
exten => 1234,2,HangUp()
exten => 4321,1,Dial(SIP/welltech)
exten => 4312,2,HangUp()
For more information about how to make the configurations in the Asterisk's configuration files please read our tutorial about the Configuring IP Phones for use with Asterisk
3. Connecting the device
At this point we have configured Asterisk PBX, now we have to connect the Welltech IAD 161 Broadband VoIP gateway to our computer and network.
Connect your computer to the first LAN port, then connect the WAN port to your network.
4. Configuration
There are three ways to configure the device:
- to use the Application Wizard included in the CD-ROM
- through telnet
- through web browser
In this tutorial we will use only the third method.
4.1 Basic
4.2 Netwrok interfaces
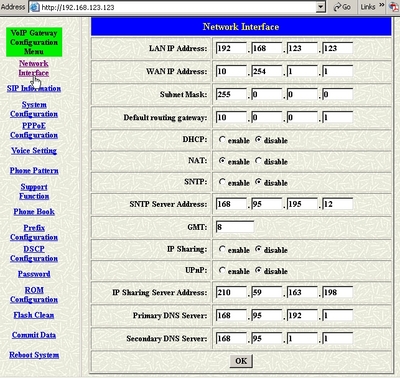
To be able to change the network options click on the Network interfaces link.
4.3 SIP information
To configure the sip settings choose the link SIP Information

The minimum information needed for succesful registration is:
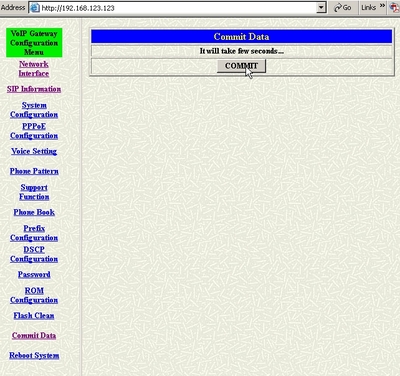
4.4 Saving setting
Before the new settings to take effect, we have to save the options and to restart the device. The steps are:
- Save the changes
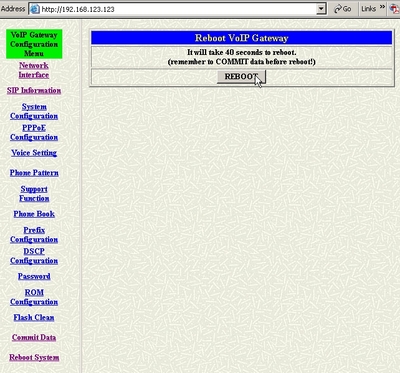
- Reboot the device
Note: It is very important first to commit the changes and to reboot the device!!
5. Testing
To test the device just dial the number 1234 from the phone connected to the FXS(phone) port of the Welltech IAD 161.
The result is : the test SNOM200 hardphone is ringing
To test incoming calls - dial from the test soft- or hardphone the extensions 4321. The result is the phone LED on the front panel will blink red and the connected phone will ring ;)
If the result is not correct just check the settings and do not forget that if you make some changes in the configuration of the device you have to commit and reboot it.
The Welltech IAD 161 is a broadband VoIP gateway that supports:
- SIP or H.323
- 1 FXS port
- 1 WAN port
- 3 LAN ports 10/100 Mbps
- T.38 fax signaling
- Audio codecs : G.711 a-Law/u-Law (mu-Law), G.723.1, G.729A
- 1 FXS port
- 1 WAN port
- 3 LAN ports 10/100 Mbps
- T.38 fax signaling
- Audio codecs : G.711 a-Law/u-Law (mu-Law), G.723.1, G.729A

On the front panel we have status LED that provides useful information for the status of the LAN ports, the system status, the use of the phone line (FXS port), etc.

On the back panel we have from left to the right : Reset button, 1 WAN port, 3 LAN ports, 1 FXS port and a power supply jack.
2. Asterisk PBX configuration
So let's begin: we need a working Asterisk PBX and a normal telephone. First, we have to create an user in sip.conf and some extension numbers in extensions.conf:
2.1 sip.conf
In sip.conf we are creating user welltech with password iad161, that will be in context voip.
[welltech]
username=welltech
secret=iad161
type=friend
host=dynamic
allow=all
context=voip
Note:For testing purpose we will use SNOM200 hardphone - how to configure the phone you can find here. You can use another softphone or hardphone for testing.
2.2 extensions.conf
In extensions.conf we have to create separate context called voip and in that context we will add an extension number that will be used for dialing the sip user welltech. For more information about extensions.conf you can find in this tutorial
[voip]
exten => 1234,1,Dial(SIP/snom200)
exten => 1234,2,HangUp()
exten => 4321,1,Dial(SIP/welltech)
exten => 4312,2,HangUp()
For more information about how to make the configurations in the Asterisk's configuration files please read our tutorial about the Configuring IP Phones for use with Asterisk
3. Connecting the device
At this point we have configured Asterisk PBX, now we have to connect the Welltech IAD 161 Broadband VoIP gateway to our computer and network.
Connect your computer to the first LAN port, then connect the WAN port to your network.
4. Configuration
There are three ways to configure the device:
- to use the Application Wizard included in the CD-ROM
- through telnet
- through web browser
In this tutorial we will use only the third method.
4.1 Basic
The default settings for the WAN and the LAN interface are:
WAN
IP Address = 10.1.1.3
Subnet mask = 255.0.0.0
Default gateway = 10.1.1.254
LAN
IP Address = 192.168.123.123
Subnet mask = 255.255.255.0
So we have to configure to configure the network card according the settings above.
In example:
IP Address = 192.168.123.124
Subnet mask = 255.255.255.0
Default gateway = 192.168.123.123
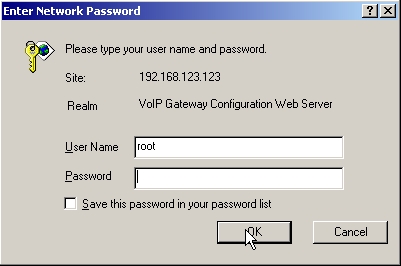
To access the web interface for configuration, we have to enter the device ip address (the interface can be accessed through the WAN and through the LAN interfaces), in our example: http://192.168.123.123
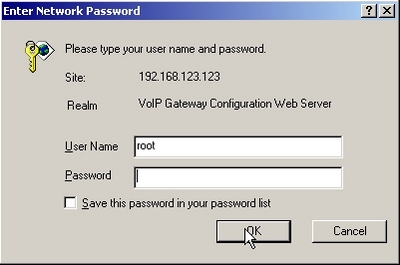
The default Telnet and Web login information are username root with no password set (leave empty - look at hte picture above).
WAN
IP Address = 10.1.1.3
Subnet mask = 255.0.0.0
Default gateway = 10.1.1.254
LAN
IP Address = 192.168.123.123
Subnet mask = 255.255.255.0
So we have to configure to configure the network card according the settings above.
In example:
IP Address = 192.168.123.124
Subnet mask = 255.255.255.0
Default gateway = 192.168.123.123
To access the web interface for configuration, we have to enter the device ip address (the interface can be accessed through the WAN and through the LAN interfaces), in our example: http://192.168.123.123
The default Telnet and Web login information are username root with no password set (leave empty - look at hte picture above).
4.2 Netwrok interfaces
To be able to change the network options click on the Network interfaces link.

4.3 SIP information
To configure the sip settings choose the link SIP Information

The minimum information needed for succesful registration is:
Primary Proxy IP Address: - Here enter the IP address of your Asterisk PBX server
Line1 Number: - The SIP account created in the beginning of the tutorial ([welltech]).
Line1 Account: - The username set for the SIP account (welltech).
Line1 Password: - The password for the account ( iad161).
Line1 Number: - The SIP account created in the beginning of the tutorial ([welltech]).
Line1 Account: - The username set for the SIP account (welltech).
Line1 Password: - The password for the account ( iad161).
4.4 Saving setting
Before the new settings to take effect, we have to save the options and to restart the device. The steps are:
- Save the changes
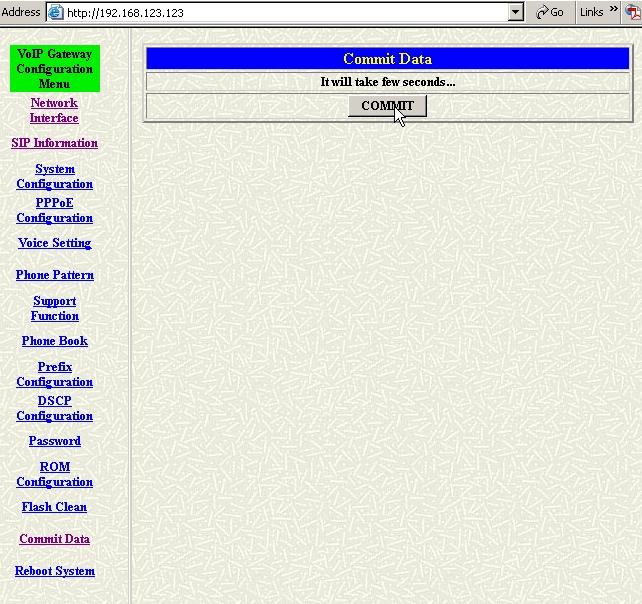
- Reboot the device

Note: It is very important first to commit the changes and to reboot the device!!
5. Testing
To test the device just dial the number 1234 from the phone connected to the FXS(phone) port of the Welltech IAD 161.
The result is : the test SNOM200 hardphone is ringing
To test incoming calls - dial from the test soft- or hardphone the extensions 4321. The result is the phone LED on the front panel will blink red and the connected phone will ring ;)
If the result is not correct just check the settings and do not forget that if you make some changes in the configuration of the device you have to commit and reboot it.
| Add Comment |
Latest Headlines:
-
T.38 faxing with Zoiper 2.15 is now easier than ever
section: voip software
-
Asterisk 1.4.21 Released
section: Asterisk
-
Asterisk 1.4.20 Released
section: Asterisk
-
Asterisk 1.4.20-rc2 Released
section: Asterisk
-
Asterisk 1.4.20-rc1 Now Available
section: Asterisk
- News Archives (older news)
Latest Tutorials:
-
Sending Fax from Zoiper to Zoiper using T.38
added 08/Dec/2008 18:16
-
VMAuthenticate (dialplan application)
added 01/Mar/2008 15:57
-
Siptronic ST-530
added 06/Nov/2007 17:57
-
Siemens C455 IP hardphone
added 05/Nov/2007 10:24
-
Zoiper
added 22/Oct/2007 17:53
Latest Comments:
-
Casino Online Games, [url=https://edaho...
tutorial: DrayTek Vigor 2900V - broadband security voip router
-
https://scream-7-taiwansub.readme.io/ref...
tutorial: Read (dialplan application)
-
Official Facebook@:-
https://www.facebo...
tutorial: SIP with NAT or Firewalls
-
https://ia800702.us.archive.org/22/items...
tutorial: Request to schedule in the past?!?!
-
https://www.imipe.org.mx/sites/default/f...
tutorial: RemoveQueueMember (dialplan application)