

3.2.11. Grandstream HandyTone-386 - SIP Analog Telephone Adapter (ATA)
1. Introduction

2. Prerequisites
3. Asterisk PBX configuration

For more information about how to make the configurations in the Asterisk's configuration files please read our tutorial about the Configuring IP Phones for use with Asterisk
4. Configurations of the Grandstream HandyTone-386 phone


5. Additional information
6. Uploaded Files
Reference:
Official Grandstream HandyTone-386 page
Grandstream HandyTone-386 is a multi-port, all-in-one, Dual FXS Analog Adapter which supports the Session Initiation Protocol(SIP2.0). It has two FXS ports, a single RJ45 WAN port and a PSTN Pass-through capability. It is easy to be used with its compact size and lightweight design. It has a built-in router, NAT and Gateway. HandyTone-386 VoIP telephone supports lots of protocols including SIP2.0, TCP/UDP/IP, RTP/RTCP, HTTP, ICMP, ARP/RARP, DNS, DHCP(both client and server), NTP, PPPoE and TFTP. It also supports different vocodecs like G.711 A-/U-law, G.723.1, G.729A/B, G.728, G.726, iLBC. In this tutorial we will show to you how to configure your phone to work with Asterisk PBX.
2. Prerequisites
To work with this phone you need two things: a working Asterisk PBX with registered users and made extensions, and the other thing is an analog phone for PSTN calls with a RJ11 connector.
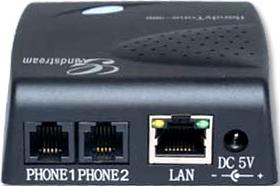
You have to put the connector in the RJ11 line jack called PHONE1. If you want to have a second line just put another analog phone in the next RJ11 line jack called PHONE2.
Next step - put the Ethernet cable in the RJ45 jack called WAN, then with the phone dial 02. You will hear your IP address. Write it down.
NOTE: You can access the menu only through the line labeled PHONE1
3. Asterisk PBX configuration
1)sip.conf
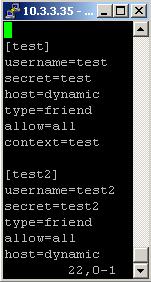
Firstly you need to register an user in the sip.conf file. In our case we are registering the user test which we will use for line1 and user test2 for line2. You have to set also the password(secret) - in our case test for line1 and test2 for the second line.
Type=friend means that this user can make and receive calls. Host=dynamic means that the IP is not static but dynamic through a DHCP server. Allow=all means that the line which this user will use support all audio codecs. Context=test - this shows that this user is working with the extensions in this context of the configuration file extensions.conf.
Type=friend means that this user can make and receive calls. Host=dynamic means that the IP is not static but dynamic through a DHCP server. Allow=all means that the line which this user will use support all audio codecs. Context=test - this shows that this user is working with the extensions in this context of the configuration file extensions.conf.
2)extensions.conf
You can see a screenshot of extensions.conf below. The first line in the context [test] show that if somebody dials the number 102 his call will be connected with the user test through SIP. In our case this user is set for line 1(PHONE1). Next line says that if the conversation is over then Asterisk has to hang up the line.
Do the same if you want line 2(PHONE2). In our example we do this with the number 104. If somebody dials it his call will be connected with the user test2 through SIP. Again its good to add an extension for a hanging up in order to be sure that when the conversation is over the Asterisk PBX will hang up the line.
Do the same if you want line 2(PHONE2). In our example we do this with the number 104. If somebody dials it his call will be connected with the user test2 through SIP. Again its good to add an extension for a hanging up in order to be sure that when the conversation is over the Asterisk PBX will hang up the line.
For more information about how to make the configurations in the Asterisk's configuration files please read our tutorial about the Configuring IP Phones for use with Asterisk
4. Configurations of the Grandstream HandyTone-386 phone
The configurations of the phone can be done in two ways: through a stored Voice Prompt or with a web browser
1) Through Voice Prompt
This way is only for basic settings such as static or dynamic(through DHCP) IP address, DNS server IP address, TFTP server IP address and subnet mask.
You can enter this menu only through the line which is labeled PHONE1
To enter the menu, just pick up the phone receiver and press the button on the HandyTone-386. There is and another way - pick up the receiver and press three times the asterisk button (*). Below I am giving you a table about which button in which menu option will send you.
Grandstream HandyTone-386 Menu:
Dial Prompt
Description
*** Enter menu option
Enter * for next, # for main menu or 01-06, 99 or any from the below listed numbers.
01 DHCP mode, Static IP mode
To change the mode - press 9.
02 IP address + IP address
It will say the current WAN IP address. If you are in static ip mode you can change the address. To do this, just enter 12 digits for the new IP address.
03 Subnet + IP address
Same as menu option 02
04 Gateway + IP address
Same as menu option 02
05 DNS server + IP address
Same as as menu option 02
06 TFTP server + IP address
Same as menu option 02
47 Direct IP calling
You will be prompt to enter the 12 digit IP address, that will be dialed.
86 Voice messages pending, No voice messages
Enter 9 to dial preconfigured phone number to check your voicemail.
99 Reset
Enter 9 to confirm the reset, or enter the MAC address to restore factory settings.
Please be careful with the IP addresses and Subnet masks. Remember that they have to be enter with the zeros.
For Example:
The IP address: 10.0.2.112 should be entered 010 000 002 111
2) With a web browser
You need the IP address of the HandyTone-386. If you dont have it already you can learn it by picking up the phone, pressing three times the asterisk button (*) and dialing 02 from the analog phone keyboard. You will hear the IP address with the zeros but remember that you have to put the it in the web browser without them.
For Example:
You hear 010.000.002.112 but you write 10.0.2.112
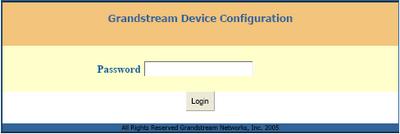
Now you have the IP address so go to your web browser and write it down. You will see this screen:
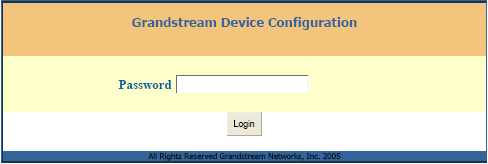
The password for the administrator by default is admin and for the user is 123
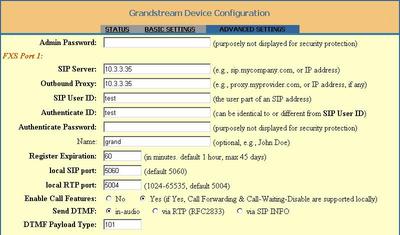
Go to the Advanced Settings. You have to set the SIP Server, Outbound Proxy, SIP User ID, Authenticate ID, and Authenticate Password.
Go to the Advanced Settings. You have to set the SIP Server, Outbound Proxy, SIP User ID, Authenticate ID, and Authenticate Password.
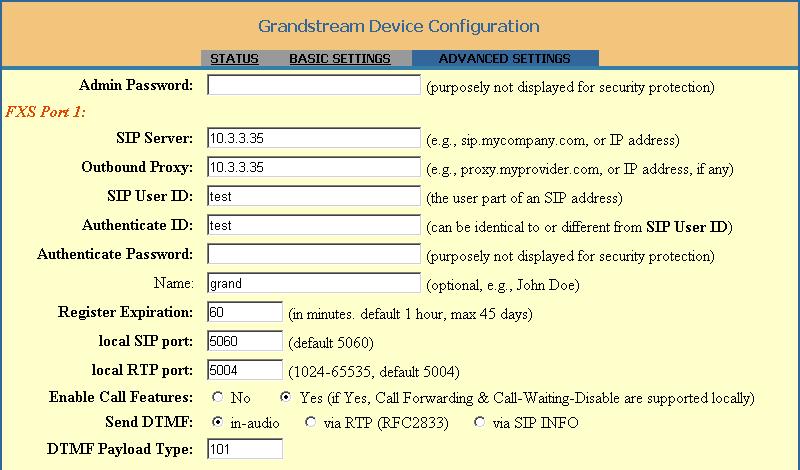
As you see on the left side with a red letters it is written FXS port 1. This means that the configurations will be for line1 (PHONE1).
So for the SIP Server you have to write the IP address of your Asterisk PBX. In our case it is 10.3.3.35. In your case could be different. For the Outbound Proxy write again the IP address of your Asterisk. SIP user ID - write the name of the registered user in your Asterisk PBX which you want to set for line1(PHONE1). In our example test. Then for Authenticate ID write the same - test. For the Authenticate Password write the password(secret) which you have set for this user. In our case it is test.
You dont have to change the other settings so keep them as they are.
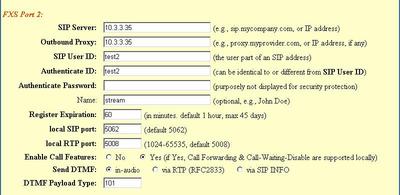
The settings for the second line(PHONE2) are the same. Again you write the IP address of your Asterisk as SIP Server and Outbound Proxy. For SIP User ID and Authenticate ID write the username of the second registered user - test2. The Authenticate Password is the secret which you have set for this user in sip.conf file. In our example - test2.
So for the SIP Server you have to write the IP address of your Asterisk PBX. In our case it is 10.3.3.35. In your case could be different. For the Outbound Proxy write again the IP address of your Asterisk. SIP user ID - write the name of the registered user in your Asterisk PBX which you want to set for line1(PHONE1). In our example test. Then for Authenticate ID write the same - test. For the Authenticate Password write the password(secret) which you have set for this user. In our case it is test.
You dont have to change the other settings so keep them as they are.
The settings for the second line(PHONE2) are the same. Again you write the IP address of your Asterisk as SIP Server and Outbound Proxy. For SIP User ID and Authenticate ID write the username of the second registered user - test2. The Authenticate Password is the secret which you have set for this user in sip.conf file. In our example - test2.
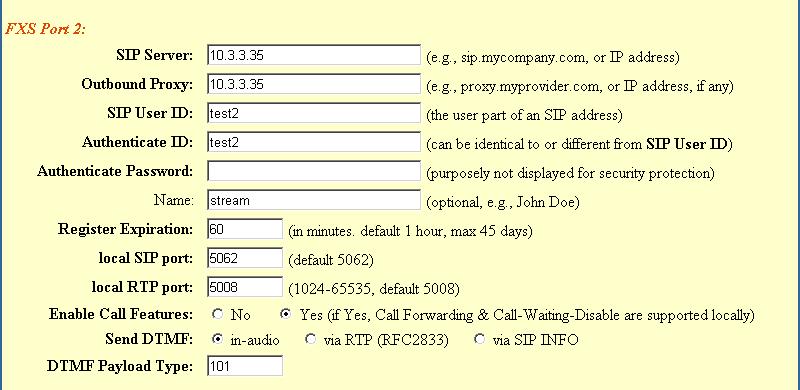
Now lets take a look at the setting for the vocodecs. Set all 6 choices for PCMA or PCMU. In our case Asterisk works with PCMA but in yours it could be PCMU. It is important to know that the all 6 choices should to be equal.

All the other settings should be left by default so the final step is to click the button Update and then to reboot the device.

5. Additional information
If you do something wrong with your HandyTone-386 you can always restore the factory settings. However this is a little bit tricky.
You need the MAC address of your device. It is on its bottom side. Now the difficult part is to translate the MAC address into numbers. I am giving you a table to show you how to achieve this:
Table
As you see it is very similar to what you do while you are writing a SMS from your mobile phone
You can also see our tutorial for Grandstream HandyTone-486
You need the MAC address of your device. It is on its bottom side. Now the difficult part is to translate the MAC address into numbers. I am giving you a table to show you how to achieve this:
Table
MAC address     Button from the keyboard     How many times to press it
       2                               2                                  1
       A                               2                                  2
       B                               2                                  3
       C                               2                                  4
       3                               3                                  1
       D                               3                                  2
       E                                3                                  3
.................................................................................
and so on
For Example:
The MAC address is: 000B82021FA9
And you enter: 000 222 82021 3333 22 9
And you enter: 000 222 82021 3333 22 9
As you see it is very similar to what you do while you are writing a SMS from your mobile phone
You can also see our tutorial for Grandstream HandyTone-486
6. Uploaded Files
Reference:
Official Grandstream HandyTone-386 page
| Add Comment |
Latest Headlines:
-
T.38 faxing with Zoiper 2.15 is now easier than ever
section: voip software
-
Asterisk 1.4.21 Released
section: Asterisk
-
Asterisk 1.4.20 Released
section: Asterisk
-
Asterisk 1.4.20-rc2 Released
section: Asterisk
-
Asterisk 1.4.20-rc1 Now Available
section: Asterisk
- News Archives (older news)
Latest Tutorials:
-
Sending Fax from Zoiper to Zoiper using T.38
added 08/Dec/2008 18:16
-
VMAuthenticate (dialplan application)
added 01/Mar/2008 15:57
-
Siptronic ST-530
added 06/Nov/2007 17:57
-
Siemens C455 IP hardphone
added 05/Nov/2007 10:24
-
Zoiper
added 22/Oct/2007 17:53
Latest Comments:
-
Casino Online Games, [url=https://edaho...
tutorial: DrayTek Vigor 2900V - broadband security voip router
-
https://scream-7-taiwansub.readme.io/ref...
tutorial: Read (dialplan application)
-
Official Facebook@:-
https://www.facebo...
tutorial: SIP with NAT or Firewalls
-
https://ia800702.us.archive.org/22/items...
tutorial: Request to schedule in the past?!?!
-
https://www.imipe.org.mx/sites/default/f...
tutorial: RemoveQueueMember (dialplan application)